Preserved Lemon, Cannellini Beans & Chickpea Pasta with Parsley Pesto

Apologies for the lack of posts and also the lack of photos in this post! I didn’t have my camera to hand as I made this recipe, but it was so delicious I had to share. So wishing everyone a very Happy New Year and lots of happiness and success for 2013! Did you have a nice Christmas/holiday period?

I have to say, I really enjoyed my Christmas this year. A big family Christmas with lots of eating, drinking and merriment. It does seem to fly by all too quickly though doesn’t it! Which reminds me, time is ticking by, so I really must start working on some of my 101 Things to do before I’m 30 list!! I still have 94 things to do…..eeek!

Happy New Year!!!

Happy New Year!!!

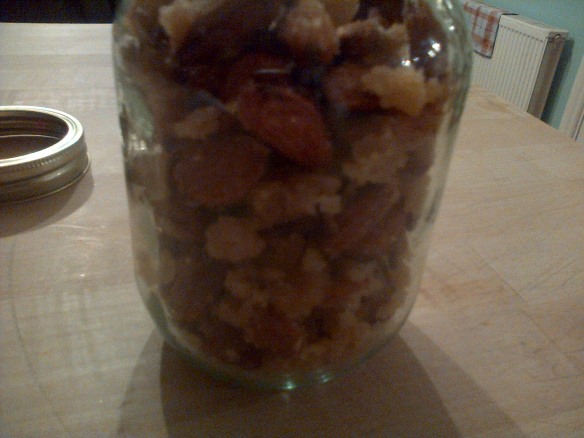
This recipe is so so good. My mum recently bought me a large jar of preserved lemons. I’ve never used them in cooking before and wasn’t quite sure what to do with them. After much searching on the internet and through various blogs, I found this fantastic recipe from The Year in Food. It was such an incredibly easy recipe. I made a couple changes to the recipe, in that I added cannellini beans, chorizo and prawns to the recipe.

Preserved Lemon, Cannellini Beans, Chickpea pasta with Parsley Pesto (Serves 4)

  • 300g pasta (I used linguine)
  • 1/3 cup plus 2 teaspoons olive oil, separated
  • 400g can of chickpeas, drained
  • 400g tin cannellini beans, drained
  • 2 garlic cloves, finely chopped
  • 2 cups fresh parsley, coarsley chopped
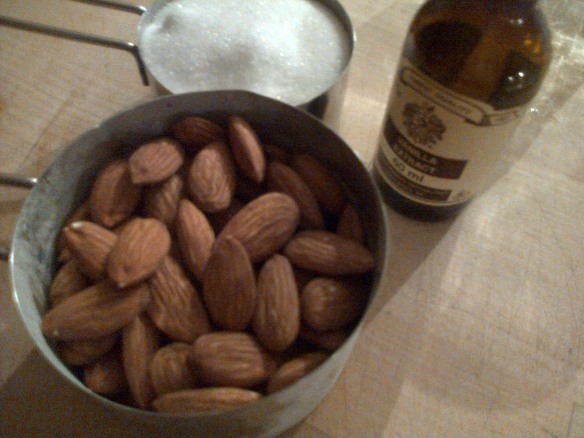
  • 1/3 cup toasted almonds, roughly chopped
  •  2 quarters preserved lemon, chopped (equal to 1/2 lemon; substitute zest + 1 tbsp lemon juice if no preserved lemons on hand)
  • 1/3 cup reserved pasta water
  • Chorizo
  • Prawns
  • sea salt + freshly ground black pepper to taste

Firstly, bring a saucepan of water to the boil. Add a little drizzle of olive oil and some sea salt. Many people believe the oil is used to prevent the pasta from sticking together, but on the contrary it is used to prevent the water from foaming and overflowing. As for the salt, an old Italian saying says to salt to pot not the pasta. If you cook the pasta without salt, no matter how tasty the sauce afterwards, the pasta will still taste bland. Cook your pasta and when cooked, reserve about 1/3 cup of the cooking water and then drain. Set aside and keep warm.

While pasta is cooking, heat a frying pan over a medium heat. Add two tsp olive oil. Add one clove of the minced garlic and stir for about 30 seconds, until fragrant. Add the chickpeas and cannellini beans. Saute for about ten minutes, stirring occasionally.

At the same time, prepare your chorizo sausage and prawns in an oven proof dish. Cook for 12 – 15 minutes at 180C (350F). The oils from the chorizo will coat the prawns in cooking, so there is no need for oil when baking. Leave aside and allow to cool.

Meanwhile, prepare the pesto. My parents have a huge parsley plant at home, which is taking over the herb patch, so I took a great big chunk of this for the pesto sauce. Here we need to combine the remaining clove of garlic with the 1/3 cup of olive oil, the parsley and the almonds. Puree in a food processor until a coarse paste has formed. Easy peasy.

Toss the warm pasta with the pesto, chickpeas, chorizo, cannellini beans, prawns and preserved lemons. Gently toss. If a little dry, add some of the reserved pasta water for creaminess. (This is a great tip for cooking all pasta dishes. Always reserve some of the pasta water to add some more creaminess to a dish.)

Taste to see if the preserved lemons provide enough salt. Season to taste with sea salt if desired, along with freshly cracked black pepper. Best served immediately.

Plate Britain

Everyone loves bacon, right? Well, except my vegetarian girlfriend, but I’m working on that.

I’d imagine, after the ubiquitous chicken, bacon is right up there as one Britain’s most popular meats. Indeed, we apparently get through 800,000 tonnes of it a year. The problem is,  the vast majority of this is really not very good quality. As this report in the Telegraph says, the majority of it is made from imported pigs, reared in very poor conditions. Not only is this cruel on the pigs (which are of course extremely intelligent animals, more than capable of outwitting me at most things) but animals raised this way undoubtedly produce low quality pork and bacon.

On top of this, mass produced bacon is cured in a manner which gets it on the shelves quickly but results in a significantly inferior product. As Hugh Fearnley-Whittingstall says in his Meat book, rather than rubbing…

View original post 676 more words

Mandeln….Roast Sugared Almonds

It’s Christmas time! 🙂 I absolutely LOVE this time of year! The run-up is almost more enjoyable than the actually day….seeing the Coco Cola advert on TV, watching the Late Late Toy Show (it’s an Irish thing 😉 ), wandering through the Saturday market stocking up on goodies, carol singers, the Christmas lights in the city, mulled wine, mince pies and decorating the house! 🙂

We’re going to put our tree up tomorrow evening, so I’ve been busy making lots of treats for a Christmassy evening decorating the house. I plan on making a few batches of mince pies this evening, recipe to follow. There’s nothing like the smell of freshly baked mince pies to get you into the Christmas spirit.

I spent a year in Germany a couple years back. Absolutely loved my time there. My favourite time of the year was the Weihnachsmarkt in the run up to Christmas. Mulled wine and crepes. And Mandeln. Mandeln are roasted sugared almonds and are so delicious and  addictive – as well as easy to make.

Ingredients:

1 cup whole almonds

2 tbsp butter

1/2 cup caster sugar

1/2 tsp vanilla extract

Pinch of salt

IMG-20121204-00014

Butter a roasting pan and set aside.

Place the almonds, sugar and butter in a saucepan over medium heat. Stir constantly until the sugar has dissolved and the almonds are toasted. This process should take about 10 minutes.

IMG-20121204-00015

Once the mixture starts to become sticky and caramelized  stir in the vanilla extract. Immediately pour the mixture onto your buttered baking sheet. Sprinkle with a pinch of salt for extra flavour. Leave to cool for approximately half an hour.

IMG-20121204-00016

This is such an easy recipe and is a nice snack alternative to crisps or sweets. It’s homemade and the kitchen smells so deliciously sweet and Christmassy afterwards! 🙂
IMG-20121204-00017

I’ll be baking my mince pies this evening so I’ll share a couple more recipes over the next couple days…..as we countdown to Christmas! 🙂

IMG-20121204-00018

Foodie Penpal November Reveal!

Well it’s been quite a busy month! I’ve been on the trot the past three weekends and finally got to rest the weekend gone past. Catching up on with friends, indulging the child in me watching the Late Late Toy Show 😉 doing some baking, etc etc. Fun 🙂

So I was delighted this morning when my Foodie Penpal package arrived from the lovely Sarah at This Is No Yolk. Thank you so much for the package Sarah once again, really thoughtful and I loved everything!

Foodie Penpal package

Foodie Penpal package

As you can see, it was quite a generous package and had a really nice theme going on! The theme was Caribbean – so Sarah provided me with a recipe and all the ingredients for Jerk Chicken. I’ve often seen Jerk Chicken done on cookery shows but have never tasted it. I’ve been meaning to try it for quite a while now and I’m definitely going to try this one out at the weekend when I’ve more time.

So the package included:

Plantain chips – again, something I’ve wanted to try for a while, but we haven’t got a sizeable Caribbean population in Limerick, so it’s difficult, if not impossible to find. But these chips were chilli and lime flavour – delicious. Munching on them as I type! 🙂

Ginger paste – always handy to have on hand for recipes

Jerk seasoning

Chillis

Garlic

Lime

Cock flavour soup mix – this sounds interesting and I think I’ll do this for my lunch tomorrow!

Creamed coconut

Herbal tea bags

Thanks so much again Sarah for the package! 🙂 I’ll do a post on the jerk chicken this weekend!

If you’ve read this and you’d like to learn more about Foodie Penpals, rock on over to ThisIsRockSalt for more information! 🙂

Foodie Penpals

Foodie Penpals

Rolo Cupcakes

I got into a bit of a cupcake craze over the summer, trying various recipes and flavours. I follow quite a number of cupcake bakeries on Facebook and Twitter and they do such a variety of wonderful flavours, it got me wanting to experiment a little. I quite like rolo’s and love caramel, so I decided to try the Rolo Caramel Cupcakes.
I have to admit the recipe had quite a few stages to it and took some time putting all together, but it was worth it in the end, cos these babies tasted like rolo’s in cupcake format! These went down a treat for a friend’s birthday party: chocolate cupcake, topped with chocolate frosting, a caramel buttercream frosting and a rolo. YUM!
This recipe makes about 15 decent sized cupcakes. The original recipe was gluten free, I didn’t have any to hand, but to make a gluten free version for yourself, just substitute with gluten-free flour.
Cupcake Ingredients:
  • 1 cup flour
  • ¾ cup cocoa powder
  • 1 tsp baking powder
  • ½ tsp baking soda
  • ¼ tsp salt
  • 1 cup caster sugar
  • 56 g chocolate, chopped
  • 8 tbsp butter
  • ⅔ cup plain yogurt, at room temperature
  • ¼ cup caramel sauce
  • 1½ tsp pure vanilla extract
  • 1 extra-large egg + extra-large egg white, beaten

Chocolate Frosting Ingredients:

  • 4 tbsp butter, softened
  • 5 tbsp vegetable shortening (I searched high and low in a few supermarkets around and couldn’t source any, so substituted with butter instead)
  • 70 g chocolate, chopped
  • 1 tsp vanilla extract
  • 1¾ cup icing sugar
  • 1 tbsp light corn syrup

Salted Caramel Frosting Ingredients:

  • 4 tbspbutter, softened
  • 5 tbsp vegetable shortening (Again, I substituted with butter)
  • 1½ cups icing sugar
  • ½ cup caramel sauce, at room temperature, salted to taste with salt
  • Rolos, for decoration

(Salted) Caramel Ingredients:

  • 1 1/2 cups sugar
  • 1/3 cup water
  • 1 1/4 cups heavy cream
  • 1 tsp vanilla extract
  • 1/2 – 1 teaspoon sea salt
I started with the caramel sauce, to allow it cool in sufficient time. Add sugar and water to a saucepan. Stir and cook over a low heat for 5 – 10 minutes until the sugar has dissolved. Using a wet pastry brush, brush down any sugar crystals that have made their way onto the side of the saucepan.
Attach a sugar thermometer to the side of the saucepan and increase the heat to medium. Do not stir the mixture at this stage. You should shake/swirl the saucepan gently just to ensure the mixture doesn’t burn. We have to wait for the mixture to reach 160 C, which takes about 5 minutes. You will notice the mixture firstly turns a light brown colour, then about 30 – 90 seconds later if turns a dark brown colour and almost looks burned.
Remove from the heat immediately. Whisk in your cream. Once you add the cream, the mixture will bubble violently, so be careful at this stage. Stir in your salt at this stage – season to taste. The caramel will last in the fridge, once covered tightly, for up to two weeks.
Now for the cupcakes! Preheat the oven to 165 C. Line your muffin tin and set aside. Place the flour, cocoa, baking powder, baking soda, salt and caster sugar in a bowl and whisk well to combine. Melt the chopped chocolate with 8 tbsp butter until melted and smooth. Set aside to cool briefly.
Add the yoghurt, caramel sauce, vanilla and eggs to the dry mixture and beat well. Add the chocolate mixture and combine well. The batter will be quite thick. Fill the muffin wells to about 3/4 full and bake for 20 minutes. Remove from the oven and allow to cool in the pan for 10 minutes, then transfer to a wire rack to cool completely.
While the cupcakes are cooling, you can make your frostings. For the chocolate frosting: Use the paddle attachment of a stand mixer and beat the butter until light and fluffy, add the icing sugar and mix until well combined. Melt the chocolate over a bain-marie until smooth. Add the vanilla to the melted chocolate and stir to combine. Pour the chocolate mixture into the mixer and beat well to combine. With the mixer on low speed, add the corn syrup and mix until light and fluffy. The frosting should be thick, but not too stiff.
For the salted caramel frosting: Beat the butter (with the paddle attachment) until light and fluffy. Add the icing sugar and mix until well-combined. With the mixer on low, slowly pour in the 1/2 cup of salted caramel sauce and mix until light and fluffy.

Rolo Cupcake

To assemble the cupcakes, fill a piping bag with chocolate frosting and another bag with the salted caramel frosting. Pipe a thin layer of chocolate frosting on top of each cooled cupcake. Allow the chocolate frosting to set for a few minutes, then pipe a thick swirl of salted caramel frosting on top of the chocolate frosting. Top each cupcake with a Rolo. Set aside to set.

Apologies I don’t have more photos of the process…as I mentioned there are quite a few messy stages to these cupcakes, but they certainly have the wow factor for any party or upcoming event!

Red Velvet Cake

I’ve tried making red velvet cake (or variations – cupcakes) on a couple of occasions in the past. Something always went wrong – I didn’t add enough food colouring on one occasion, over beat the egg whites for the Swiss buttercream so it turned to marshmallow on another occasion. But never mind, one lives and learn and you always learn something for the better through these little mistakes.

This time however, the process was relatively simple and the cake was made and baked within about 40 minutes. Couldn’t have been easier. The recipe I used was as follows:

Ingredients:

  • 2 1/2 cups flour
  • 1 1/2 cups caster sugar
  • 1 tsp baking soda
  • 1 tsp fine salt
  • 1 tsp cocoa powder
  • 1 1/2 cups vegetable oil
  • 1 cup buttermilk
  • 2 eggs
  • 2 tbsp red food coloring
  • 1 tsp white vinegar
  • 1 tsp vanilla extract

Preheat the oven to 350 degrees F. Lightly butter and flour 2 9 inch cake pans.

In a large bowl, sift together the dry ingredients (flour, sugar, baking soda, salt, and cocoa powder). In another large bowl, whisk together the wet ingredients: oil, buttermilk, eggs, food coloring, vinegar and vanilla.

Using a mixer, pour the dry ingredients into the wet ingredients until just combined and a smooth batter is formed.

Divide the cake batter evenly among the prepared cake pans. Place the pans in the oven and bake for 30 minutes or until a toothpick comes out clean. Remove the cakes from the oven and run a knife around the edge of the cake to loosen them from the sides of the pans. Allow the cakes to completely cool in the cake pans.

Red Velvet Cake

Swiss Buttercream Frosting:

This is where I hit a little bit of trouble, but with a little bit of googling, I managed to get myself out of a curdling situation.

  • 1 cup egg whites
  • 1 1/2 cups sugar
  • 2 cups butter, softened

Directions

Beat the sugar and egg whites together on a bain marie until the temperature reaches 120F, on a sugar thermometer, and the sugar is fully dissolved. Transfer to the bowl of a mixer and beat until there are soft peaks. Then begin to add the butter slowly, until fully incorporated and fluffy. I let the mixture beat a little too long once the butter had been added and the mixture started to curdle and separate. It looked almost like a sloppy scrambled egg at this stage. Unfortunately, I didn’t get a picture of this mess in my panic at the time, but if this happens to you, you will know what I mean.

Luckily enough, I came across someone who had this same problem on google. She advised to take 1/4 of the mixture and heat it in the microwave for 10 – 15 seconds. Remove it from the microwave and add it to the mixture once again and beat. Magically, the mixture started to come together once again into a fluffy creamy buttercream.

Once all this is done, simply frost your cake. I topped with a little bit of cocoa powder and serve.


mmmmmm….Mint Chocolate Aero Cake

It was my cousins birthday last weekend and she loves a bit of home baking. She requested I bake a cake, so I decided to do something a bit special. Hence, a Mint Chocolate Aero cake. The recipe seemed quite complicated at first, but it was actually quite easy to make. There are a few different stages, but it was worth all the work, because it really was absolutely delicious. The chocolate cake was light and airy and the mint mousse was delicious and really gave the flavour of Mint Aero! It’s quite a rich cake, so small slices will serve about 10 – 12 people. So here’s the recipe:

Chocolate Cake:
275 g plain flour
500 g caster sugar
75 g high quality cocoa powder
2 tsp baking soda
1 tsp baking powder
1 tsp salt
240 ml buttermilk, shake well before using
120 ml vegetable oil
2 large eggs
1 tsp good vanilla extract
1 cup freshly brewed hot coffee (I just used instant coffee, as none of us are coffee drinkers)

Mint Chocolate Mousse filling:
This was so easy to make and really was so yummy! I used the same recipe as the chocolate ganache but substituted with white chocolate.
225 g white chocolate
300 ml whipping cream
Good few drops of peppermint essence (I judged by taste how much was needed)
1 – 2 drops green food colouring

Chocolate Ganache:
450 g good quality chocolate
600 ml whipping cream
Optional: Mint Aero Chocolate Balls to decorate

Firstly, preheat the oven to 180 C. You will need two 19 cm round spring form cake tins. Line the bases with parchment paper, then butter and flour the pans.

Measure out your dry ingredients (flour, caster sugar, cocoa powder, baking soda, baking powder and salt) and sift into the bowl of your food mixer. Use the paddle attachment. In a separate bowl, whisk the wet ingredients together (buttermilk, oil, eggs, and vanilla). Put your mixer on low speed and slowly add the wet ingredients to the dry. Once combined and with the mixer still on a low speed, add the coffee and stir until just combined. Make sure to scrap out the bottom of your bowl with a spatula to make sure all the ingredients are combined.

The batter is a very runny consistency at this stage. Pour the batter between the two tins and bake for 35 – 40 minutes until a skewer comes out clean when inserted into the cake. Once you have removed the cakes from the oven, cool in the tins for around 30 minutes. Turn them out onto a cooling rack and cool completely. Once they have completely cooled, wrap them in cling film and chill for at least 3 hours in the fridge. I allowed them to chill overnight.

If you are going to make the mint chocolate mousse, it’s probably to do this the night before as well and allow it to chill in the fridge overnight. If you are short for time, you can chill it for 3 hours in the fridge alternatively. Break the chocolate into small pieces in a large mixing bowl. Meanwhile, slowly bring the cream to a boil in a saucepan. Once it has reached a boil, remove from the heat and allow it to cool slightly for a couple of minutes. Then pour the hot cream over the chocolate and allow to cool for 10 minutes. Next, whisk the cream and chocolate together until smooth and allow to cool until it reaches room temperature. Add in your green food colouring and peppermint essence at this stage. Next, using an electric hand-mixer (or hand whisk if you want to work on your muscles!) beat the mixture until it is shiny and fluffy and holds it’s shape. This can take a couple of minutes. Once you have beaten the mixture until it holds it’s shape, cover the bowl with cling film and allow to chill in the fridge. Next morning, you have a delicious minty mousse.

You use the same procedure as above to make the chocolate ganache, without allowing cooling time as the ganache will set quite quickly and you need to work quickly once it’s made to assemble the cake.

Mint Aero Cake

When ready to assemble, sandwich the cake layers with a layer of your mint chocolate mousse. Lightly coat the outside of your cake with the chocolate ganache, then use the rest of the ganache to ice your cake. Make sure to work quickly or ganache will set. Decorate top of cake with the mint aero chocolate balls. Serve. Delicious! 🙂

PS – sorry for the bad quality photos!

A messy mint aero cake – after being half devoured! 😉

October Foodie Penpal Reveal Day

I hadn’t realised it had been so long since I last posted on here. October was a hell of a month. I was very happy to see the end of it. About three and half weeks ago, our house was burgled. Some opportunists struck lucky and made off with a brand new Trek bike, a laptop, hard drives, jewellery and quite an amount of vouchers. It could have been a lot worse, as we were asleep in the house. Thankfully, nobody was hurt and they didn’t come near our bedrooms. I suppose unfortunately these things happen and there’s nothing you can do about it. And the worst thing is, these guys will probably never be caught and they’ll get away with it time and time again. But as I said, it could have been a lot worse! It’s just quite unnerving to realise that someone was in your house while you were there unbeknownst to us. It felt like quite a violation.

Then couple days later, I was struck down with a severe case of tonsillitis and spent the guts of the two weeks in bed trying to recover. October has not been a good month.

Foodie Penpal

So as a result of these little mishaps, I was a little late sending my Foodie Penpal package to Rachel at FoodNerd4Life – apologies once again Rachel. And apologies I’m late with my Foodie Penpal reveal day, but I haven’t had a chance to update the blog to date. I received my package from Rachel at Silver and Green.

My foodie penpal package from Rachel

Wow. What a little box of tricks 🙂 Thank you so much Rachel for the package, it was so generous and thoughtful. I really loved everything in it!

A little box of goodies 🙂

I really wasn’t expecting so many lovely things. I was like a child on Christmas day unwrapping the box! Rachel, and her partner, run a food business producing and importing Mediterranean delicacies such as olives, olive oil, antipasti and tapas. If their website is anything to go by, they are passionate about food and are definitely worth checking out here: Silver and Green.

So my package included a lovely jar of orzo. I’ve never really used orzo before, but Rachel has included a yummy recipe, which I hope to try over the weekend!

Jar of Orzo

She also included some garlic. Rachel must have psychic powers, because I love garlic!

Garlic

Rachel also included some yummy local delicacies such as Cumberland sauce (which I love!), flavoured salt (will be perfect for a roast chicken) and honey mustard!

Yumminess!

A little treat also in some salted almonds. Which I’ve been advised are a perfect accompaniment for a couple of drinks, so I think I’ll try those this evening seeing as it’s Friday and all! 😉

Salted Almonds

Thanks so much again Rachel, once again a very generous package! 🙂 If you’d like to sign up to Foodie Penpals and are in the UK or Europe check out this blog thisisrocksalt.com or if you’re in the US check out theleangreenbean.com.

Looking forward to this month’s Foodie Penpal shop already! 🙂

Edit: I have just learned that The Lean Green Bean and This Is Rock Salt are both organising a Foodie Penpals for charity in December. Regular Foodie Penpals will resume in January, but for December penpals are being asked to donate to charities helping victims of Hurricane Sandy. A very worthwhile cause in the run up to the festive season. To signup or learn more details see here: Foodie Penpals for Charity

Roast Carrot and Sweet Potato Soup

Following on from my post about making chicken stock, I used some of my stock to make a delicious carrot and sweet potato soup. I made this up basically as I went along, but it was lovely – sweet and tasty.

For this recipe, I used:

1 medium sweet potato

3 carrots

1 tin chickpeas

1 onion and 2 cloves garlic

1 tsp cinnamon

1.2 litre stock

1 cup water

Firstly, I roughly chopped the carrots and sweet potato and roasted them in the oven for about 30 – 35 minutes at 175 C.

Sweet Potato and Carrot Soup

Meanwhile, I gently sweated the onion and garlic in a saucepan. After about 15 minutes, I added the roasted carrots and sweet potato, as well as the can of chickpeas. Add 1 tsp of cinnamon for flavour, stir well to combine flavours.

Next add the chicken stock and cup of water. Bring to the boil, then reduce to a simmer. Allow to cook for about 15 minutes, then remove from the heat. I then blitzed in the food processor and voilla…a yummy soup was made!

I had a bowl myself right there and then and bagged the rest to be frozen. These Pour and Store bags from Aldi are so handy!!!

Savory Muffins

I’ve been out of my fitness regime now for quite a while. I haven’t been to Spin in almost two months, but I’m booked in to go on Monday evening. The fear. It’s going to be horrendous getting back up on that bike, but all the worthwhile afterwards. So with the fitness regime, comes the healthy eating and diet again. I decided today instead of baking sweet treats, I’d make some savory muffins as healthy snacks. Pop them in the freezer, ready to reheat when needed.

I found this recipe on the internet. These muffins were hassle free and took literally minutes to throw together. This time I made chorizo, cheese, tomato and chilli muffins, but there are so many variations you could try: chorizo and spinach; ham and cheese; cheese and onion; spinach, feta and roasted pepper; courgette and lots lots more. I’m looking forward to making more variations.

Ingredients

  • 1 chorizo sausage
  • 1 red chilli
  • 1 cup chopped cherry tomatoes
  • 1 cup good cheese, grated
  • 2 1/2 cups self-raising flour
  • 1 sp baking powder
  • 1 egg
  • 1 cup soy milk (or regular milk)
  • 125 g melted butter, cooled

Preheat your oven to 200 C. Line a muffin tray with cases and leave to the side.

Fry off the chorizo, chilli and tomatoes

Melt the butter and leave aside to cool. Gently fry off the chorizo, chilli and cherry tomatoes for about five minutes. Leave to cool for a few minutes.

Old Irish Creamery, Seaweed Cheese

Meanwhile sift the flour and baking powder into a bowl. Stir in the cooled chorizo mixture, as well as the cheese. I picked up a lovely seaweed flavoured cheese from the Old Irish Creamery at my local market (Limerick Milk Market) this morning and decided to use this for some extra flavour.

In a separate bowl, whisk the egg, milk and cooled butter together. Make a well in the dry mixture and pour in the wet mixture. Fold until it just comes together.

Muffin mixture

Pour into muffin cases and bake for 20 – 25 minutes. As I mentioned above, I’m going to freeze most of this batch and reheat as needed as a filling snack – better than a bag of crisps or chocolate bar! 😉

Savory Muffins